This is the second post I promised I would publish because some people had already asked me about it, so here we go, and I hope you can still find it helpful.
When I wrote about my sourdough I warned I was no expert at all and that it was my first time attempting any of the sort, so my experience should not be taken as a guide of any sort, BUUUUUUT in the case of this post I can tell you I have had tons of experience because I have enjoyed gardening for many years, and thanks to several projects I have had because of my job I have a good deal of theoretical background for what I am doing in terms of horticulture. This means I actually feel confident this time and this post could actually be considered some sort of a basic tutorial if you feel like working on your own vegetable garden.
First of all, when I decided I wanted to start this project I chose to do it in a vertical format for quite a few reasons. Truth be told, in the bottom of my heart I knew that if I started planting things on the ground I wouldn’t be able to refrain myself and soon my garden would disappear, my children would not have a place to play freely without me yelling at them – Get off my tomatoes! Don’t touch those lettuces! Oh, for goodness sake, that eggplant tree is not a toy! – and I would still feel unsatisfied with my resources because once you start planting, you always want more… trust me, I’ve been there.
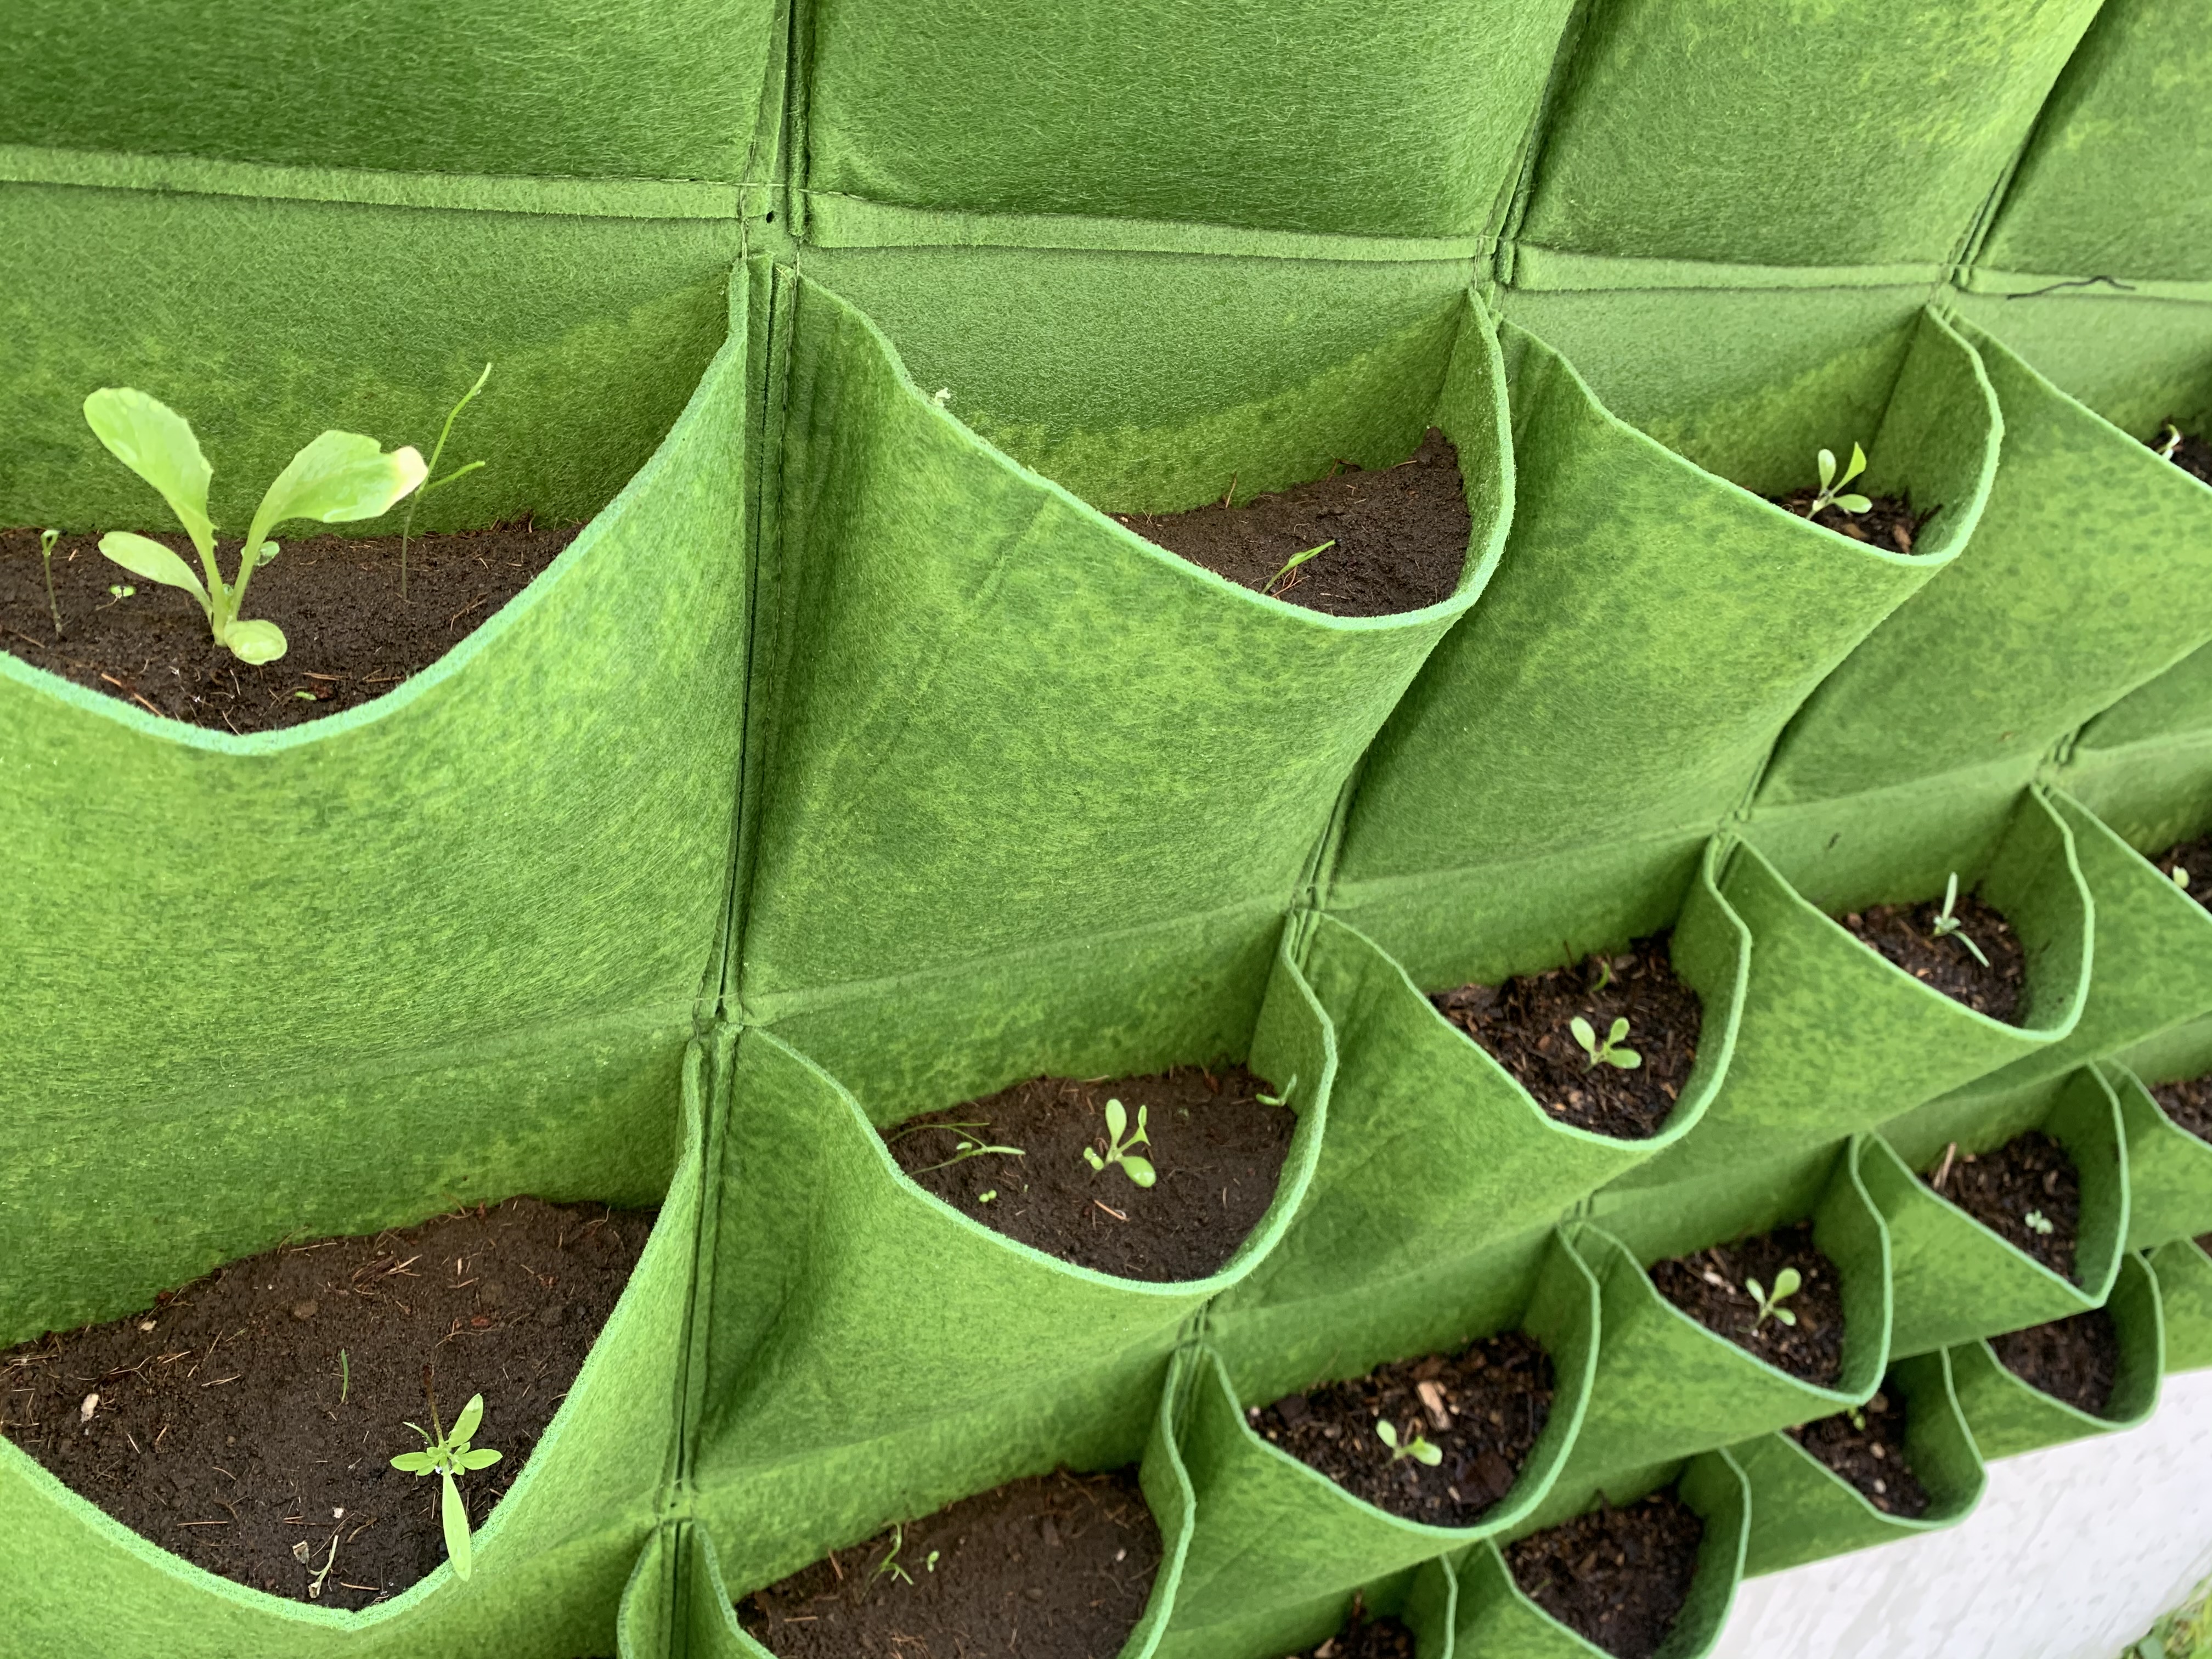
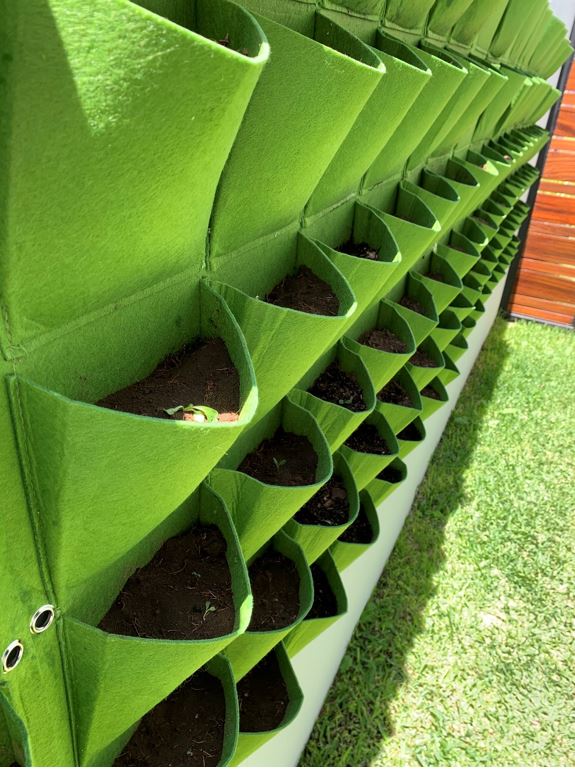
So, in order to limit my space and my enthusiasm, I got four vertical garden bags with 36 pockets each – thanks, mom and dad, they gave them to me as a birthday present.
These are the ones I chose:

And you can get them from Amazon over here: https://www.amazon.com.mx/gp/product/B071QXF2QF/ref=ppx_yo_dt_b_asin_image_o04_s01?ie=UTF8&psc=1
Although they are considerably much more expensive than what they were just two months ago.
Something I took into consideration is the depth of each bag, since I wanted to grow some leafy plants that need 25 to 30-centimeter-deep soil, and these pockets are maximum 15 cm deep. As I didn’t find any bags with deeper pockets, I decided I would take my chances and maybe not expect to get the largest possible spinach, but a smaller one with smaller roots.
I placed my bags on a wall that does not get direct exposure to sunlight all day long, but only for a couple of hours during the afternoon because it is facing east and the side wall of my house protects the bags all morning long. It is directly under the sun perhaps only from 1 to 4 o’clock during this season. I was honestly doubting if this was my best option, because several of the plants I got need direct sunlight exposure – some of them need at least 6 hours of direct sun – while others do not feel so comfortable being so hot – keep in mind the weather in Tlajomulco at this point of the year is about 32°C and that kind of temperature does not make some plants – and I refer to my previous example, like the spinach – very happy. But once again I had to compromise and find middle ground that could possibly work best for my current choice of vegetables and herbs.

Choosing which substrate to use was also interesting. I personally prefer using leaf substrate, but since many of the conditions were already different from what I would have considered optimal for all my choices, I went for the experimental spirit and chose two different kinds of substrate. Leaf substrate of course was my first choice, but I also used black soil. After a first harvesting cycle perhaps I can choose which one I prefer under these specific circumstances and then choose whether to keep them both or just work with the one I like the most.
I got three beautiful plant germination trays because many years ago I was lucky enough to help with the interpretation of a two-week long training course on indoor farming, and I could see how effective it was to use these trays because you could control a greater deal of the variables involved in the germination process, and your plantlets could grow to a point in which they were strong enough for transplantation.
These germination trays were very affordable to my surprise (about 70 pesos or 3.5 USD each at the time, hah hah hah, don’t get me started on the current exchange rate or I will start crying right here).

I got them from this supplier, so if you are anywhere in Mexico you can get them in a couple of days: https://articulo.mercadolibre.com.mx/MLM-608337866-charola-rigida-72-cavidades-ojo-venta-minima-3-unidades-_JM
And I also bought most of my seeds from that same supplier.
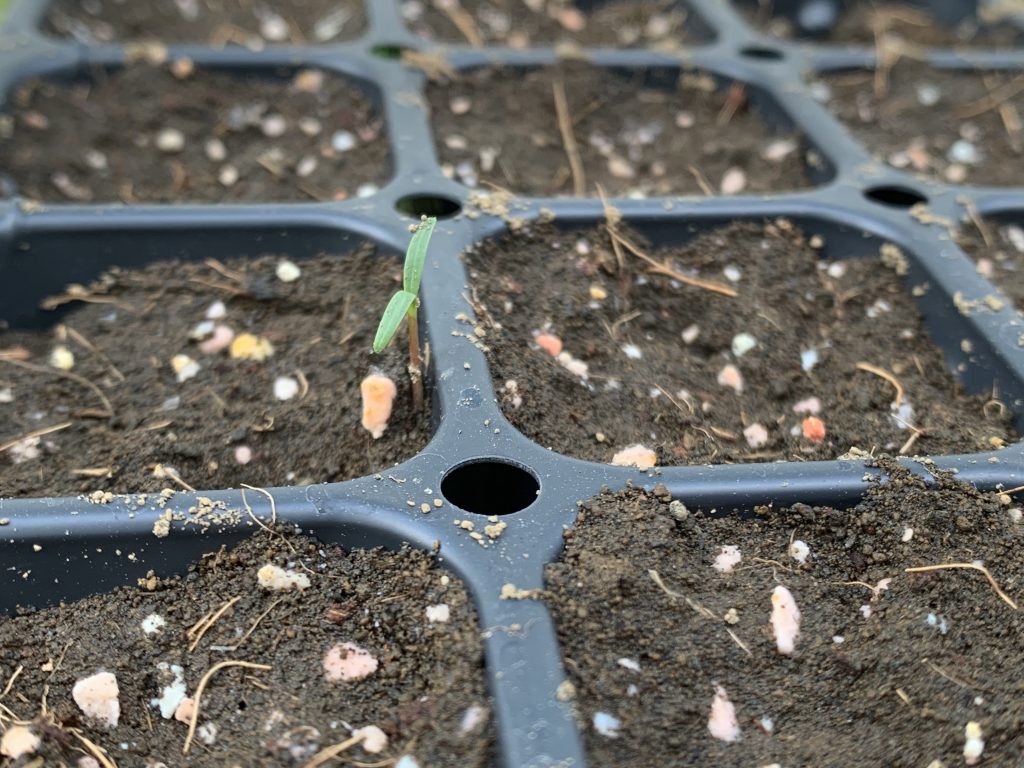
If you choose to get trays as I did, try to get trays with holes in the bottom. Most seeds need good drainage, otherwise they’ll rot. If your trays don’t have these orifices, then start making them, using a knife or a screwdriver. Same goes to any pot you might want to use if you are going for pots instead of trays or bags with pockets – if they are not perforated, that’s the very first thing you need to do, or water will have nowhere to go, and your plants won’t like that.
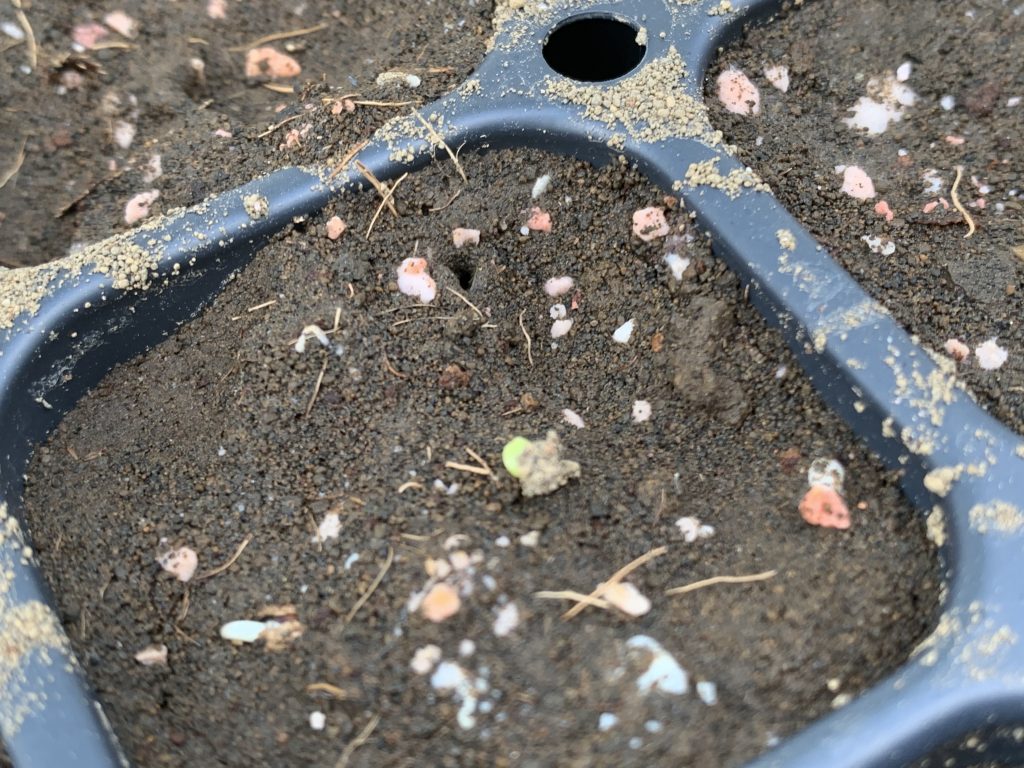
I filled my trays with black soil and placed the seeds. For future reference, I took a picture of how I had planted the seeds:

I put the tray in a place where it wouldn’t get direct sun light because plantlets are delicate and can be weakened by extreme heat. Something that is SUPER IMPORTANT: do not water your seeds with a hose or pouring a glass of water directly on the tray. At this point, as the seeds are so small and delicate, you don’t want them to ‘bounce’, but to rest peacefully in their little patch of dirt. So, at this point, although my daughter was super excited about helping me, I would let her do other things, because I wanted the sprinklers do most of the work. It is a finer mist, droplets that won’t hurt your seeds or your still weak plantlets. Once the plants start getting stronger, children can take part in the watering process if they want to help.
After only three to four days, the first signs of life started showing:

But you need to wait, specially because some plants are more delicate than others, and they cannot be just transplanted the very next day they start showing. Some seeds can be transplanted when they reach a certain height, some others need to get a second set of leaves, so make sure to read which is the optimal situation in each case, depending on what you have started growing.
After a week or so, my germination tray looked like this:

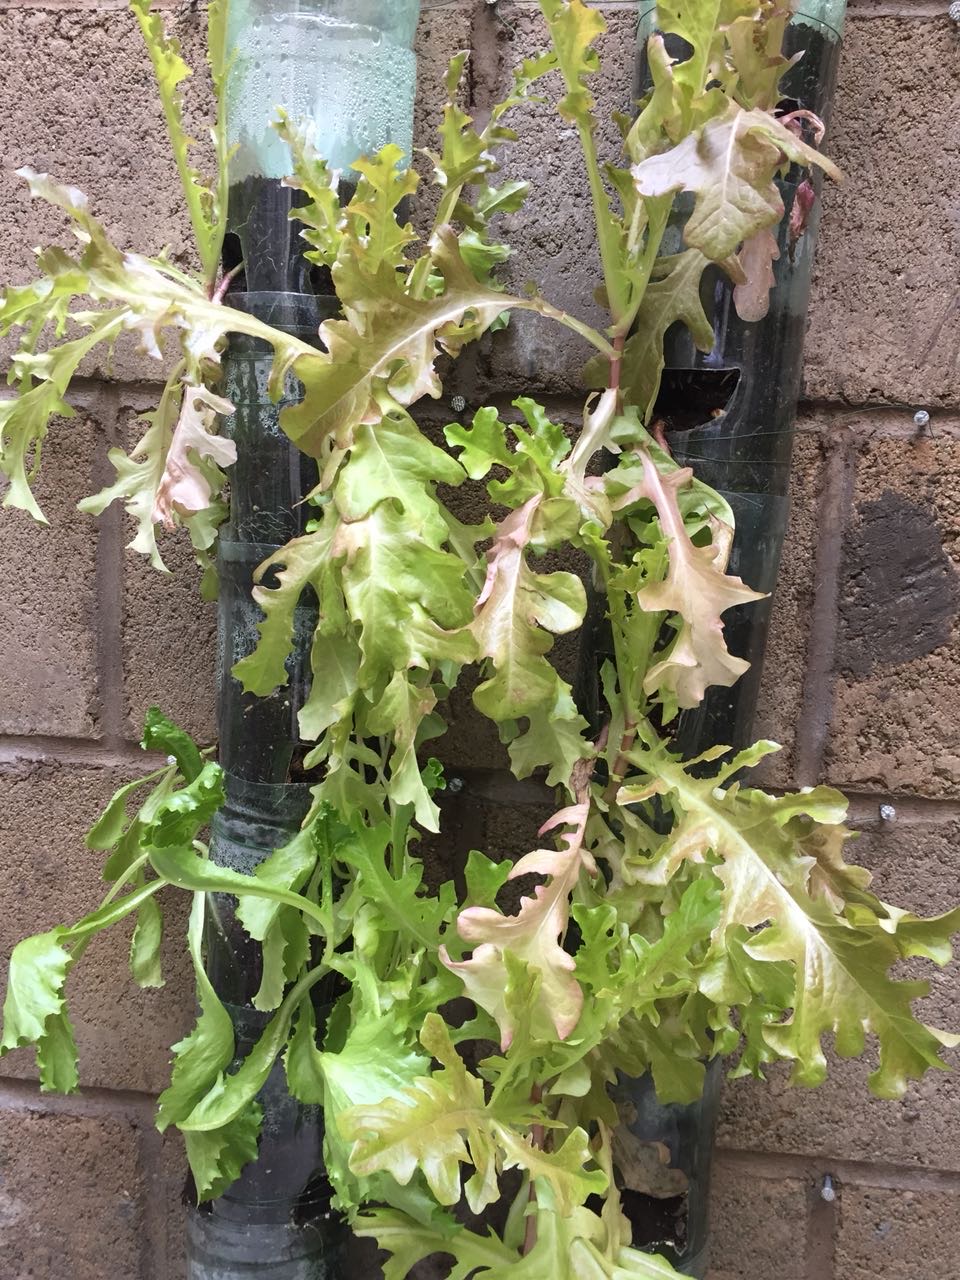
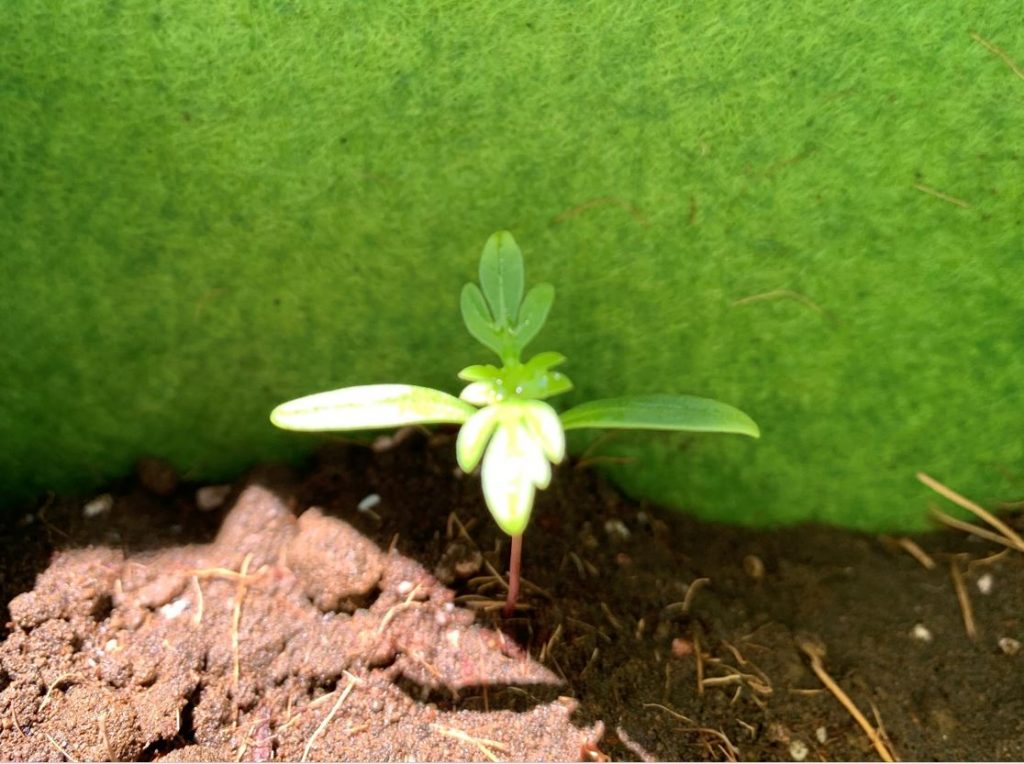
And I decided I could start transplanting some of the plantlets to their pockets. Once again, check guides online that are specific to the sort of plant you are dealing with. Some will tell you if the soil in the pocket needs to be wet or dry, and also you could make decisions regarding in which position you will place each plantlet depending on how much sun each side of your bag gets, and depending on the needs of your plants. You have to be very observant of how the sun rises and sets, and be aware of that, since the survival of some of your plants might depend on that. Lettuces like direct sunlight, but not when they are too young – you could dry them and then their recovery might take a long time, or not happen at all. Thing of them like little babies you want to stay alive! And don’t worry if you make some mistakes, you’ll see in this next picture just how sad and dead my lettuces look, but wait and see how well they recovered in a picture I’ll show you a little later:
Make sure to water your plants without being too aggressive with them – remember, don’t use the hose directly on them, I have a sprinkler that I can easily manipulate, and that has helped me a lot. Do not wait for your upper pocket to fill and then drip the water to the other pockets… that won’t happen. Remember this sort of material (felt) is highly absorbent, so that would mean the top line of pockets should be completely flooded, and even then, the lower line would not be wet enough. Either water each pocket individually with the help of a bucket and a cup – pour the water using the walls of your pocket, do not pour it directly on your plant – or use something like the sprinkler I had previously mentioned. There are some fancy watering systems that work by dripping water on your bags, but they are too expensive for my taste and honestly, watering my four bags (4 square meters, 144 pockets in total) does not take me more than 10 minutes and I personally find it very relaxing, plus, it gives me the chance to check how everything is going with my plants.
I like to water my plants twice a day. I water them early in the morning – before 9 am, so the sun won’t heat the drops that may have been left on the leaves of the plants, because that can burn them, since it causes a ‘magnifying lens effect’ – and at night, when I know the sun won’t dry the water. I know some people who don’t like doing this, though, because plants actually have cycles, like humans do. They are not so evident to us, but please, look at some plants and you’ll see I am right. Some plants even ‘fold’ their leaves at night, because they go into a passive cycle similar to the sleeping cycle in humans, so some people don’t like to water their plants at night because that could force them to ‘work’ at night by absorbing the water and minerals instead of relaxing, but hey, I am savage like that. You check when it is that you find it more convenient for you, but try not to water your plants during a moment of the day you know your plants won’t make the most of it, like noon, because very probably the water will evaporate five minutes after you have given it to your plants, and they won’t have the time to take advantage of it for sure.
I thought I could do something smart and wrote the name of the plants I was going go place in each one of the rows in my bags, so that I would not mix them or feel confused when they started getting bigger, and here’s where my method went to hell, because apparently, some of my seeds did bounce in the tray, and when I started transplanting them, some of the plants in the same row didn’t look at all like their sisters. At the beginning, my logic was flawless, but then I saw I had a row in which I had only one Italian lettuce that had been germinated in its row in the tray, and I had like 20 things that looked like cilantro, and I must admit I was deeply surprised, because I had only planted 6 of those. So, the names on top of my bags might not be helpful after all, but I wanted to share this tip with you, in case you are indeed more careful and it sort of makes sense to you.

In the end, this doesn’t bother me too much because all the plants in the tray are edible, so I’ll only wait and see how to use them when the time comes.
Little by little you’ll see how your plants start getting stronger, bigger and more beautiful – or not, remember this is a process and there will be some casualties in the process and you don’t need to feel like a failure if half of your seeds don’t germinate at all, or if they die a little after you have put them in their new home. Something good is that if things don’t work out the first time, you’ll have many more chances to try again – remember the most difficult part is getting the basic components, or the space for your garden, but once you have decided this patch of land is for vegetables, or once you have gotten the bags and the soil, getting your project going is super easy.
Remember if you cannot get seeds from a supplier you can plant many of the things that made you happy last time you shopped at the market… did you enjoy that tomato? Save some of the seeds in it and throw them in a pot, then choose the stronger plantlets when they start sprouting – I literally did that and out of a handful of tomato seeds I got about 20 healthy plantlets, so I transplanted most of them to a different part of the garden, because 20 tomato plants in a pot cannot survive and you’d eventually kill them all by not doing anything.

Did you enjoy those strawberries? Save one, slice its skin thinly and place pieces of it in your pockets or your pots, if you water them they will start growing up in 7 to 10 days:
Just keep in mind not all seeds are good for vertical gardens… I mean, don’t expect that watermelon seed to thrive in that little pocket, or avoid planting citric seeds or that potato that already started sprouting in the back of your fridge – that one would work well in a bucket. Try things that you know work well in small spaces, that’s why herbs are some favorite choices for this sort of projects, basil, rosemary, mint, thyme… in my garden for example I planted some Genovese basil, cilantro, and parsley.
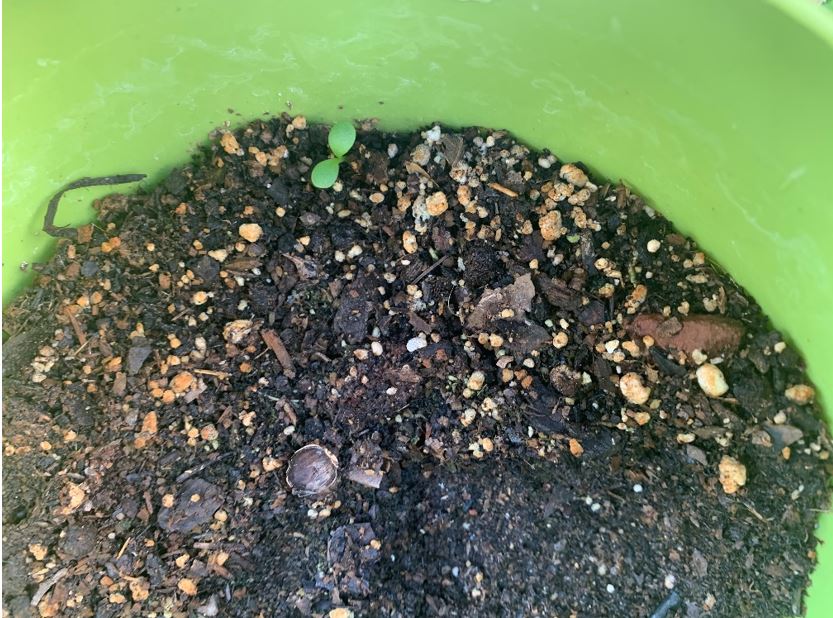
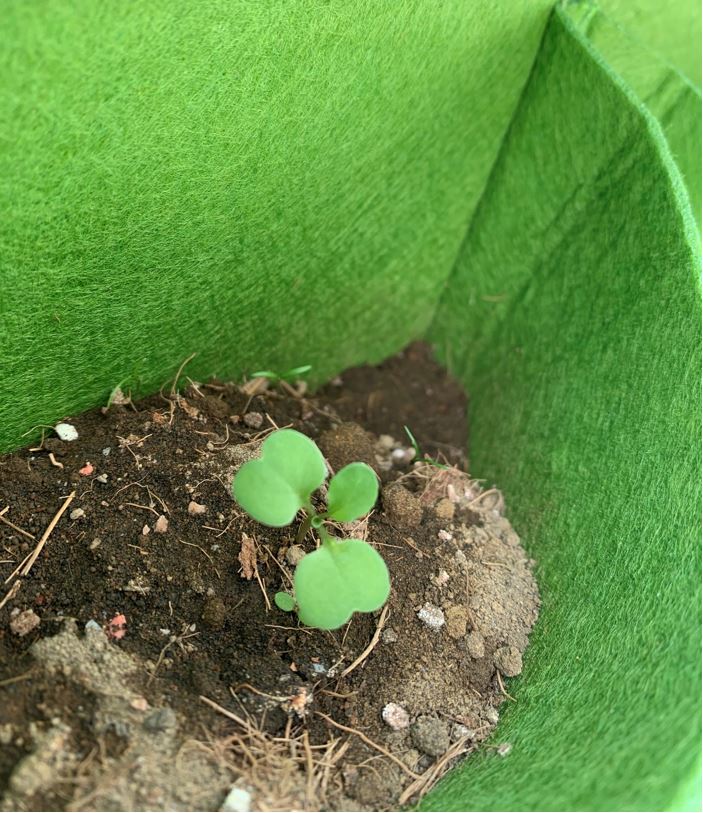
You’ll of course will try to have one plant per pocket, but don’t be surprised if somehow you end up with some empty pockets because your plantlet died shortly after being transplanted, and then you realize you have several plants growing up in one pocket, like this one, that looks like a miniature garden.

I swear I have no idea what happened there, and I’m waiting to see how they grow up to know if I should remove any of the plants or just let nature do its thing and let the plants decide which one lives or dies.
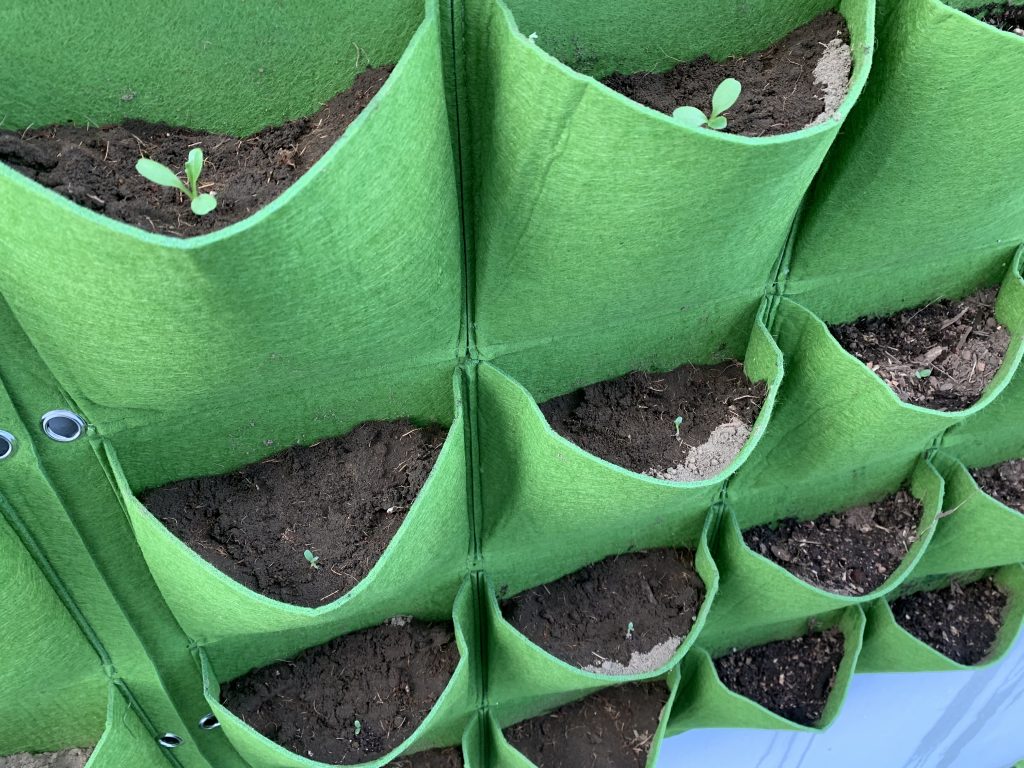
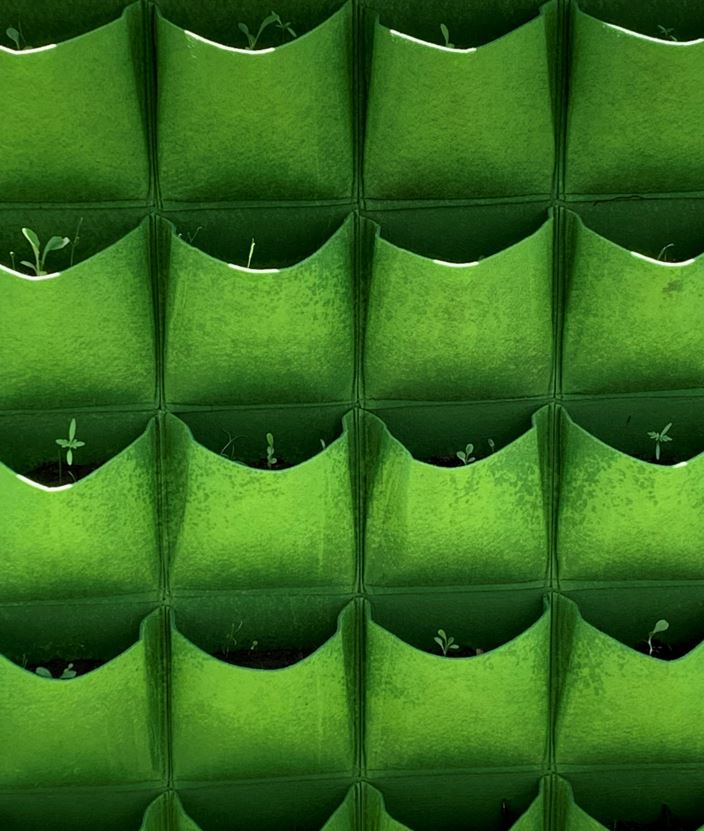
Now you can enjoy watching as your vertical garden matures, these are some of the pictures of my project so far:


Last but not least, you need to keep track of the date when your seeds were planted, to be able to predict when they will be ready to be harvested, and also how to harvest them when the time comes.
For example, herbs in this kind of gardens are not cut when they are already grown, but whenever you need to cook anything you take a couple leaves or branches of your plant and then let it grow back up.
Lettuces are ready to be eaten between 30 and 60 days after they have been planted, and there are several methods to harvest them: either you pick up the whole piece and keep it in your fridge for some days – as you would with any lettuce you might get from the market – or you eat your lettuce leaf by leaf, starting from the outside, thus allowing your plant to regenerate. However, when lettuces get to their reproductive phase, their taste becomes bitter and they start growing their flower to produce seeds, so you need to decide what to do with your vegetables and when.
Radishes are ready to be eaten only three weeks after the seed was placed on the soil – that’s super fast! And you need to keep an eye on them to pull them whenever they are ready.
So, in short: plan ahead, take your variables into consideration, be gentle and have lots of fun!
Luckily there are thousands of tutorials and resources online, if there is anything I can do to help, feel free to ask, if I know the answer I’ll help you, or I could tell you were to find the answer.
Have fun and feel free to share the images of your plants when they come out! You’ll see it is a little bit like sharing pictures of your babies. I’ll be ready to “aaawww” and “ooooooh” at them when you show them to me, I promise!